Arduino - introduction
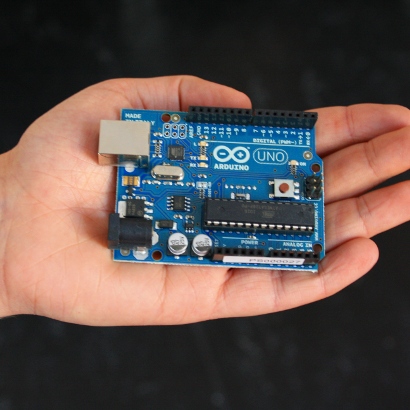
Arduino is a small circuit board that you can use to bring the physical world into the data world, and the data world into the physical world. For example, you can measure temperature, light, CO2, distance, movement or humidity, and connect buttons, switches or displays to control and display information, or motors to set something in motion. If you see an electronic installation, it is likely that Arduino is in use.
Blink built-in LED
void setup() {
  // initialize digital pin LED_BUILTIN as an output.
  pinMode(LED_BUILTIN, OUTPUT);
}

// the loop function runs over and over again forever
void loop() {
  digitalWrite(LED_BUILTIN, HIGH);   // turn the LED on (HIGH is the voltage level)
  delay(1000);                       // wait for a second
  digitalWrite(LED_BUILTIN, LOW);    // turn the LED off by making the voltage LOW
  delay(1000);                       // wait for a second
}
Fade LED
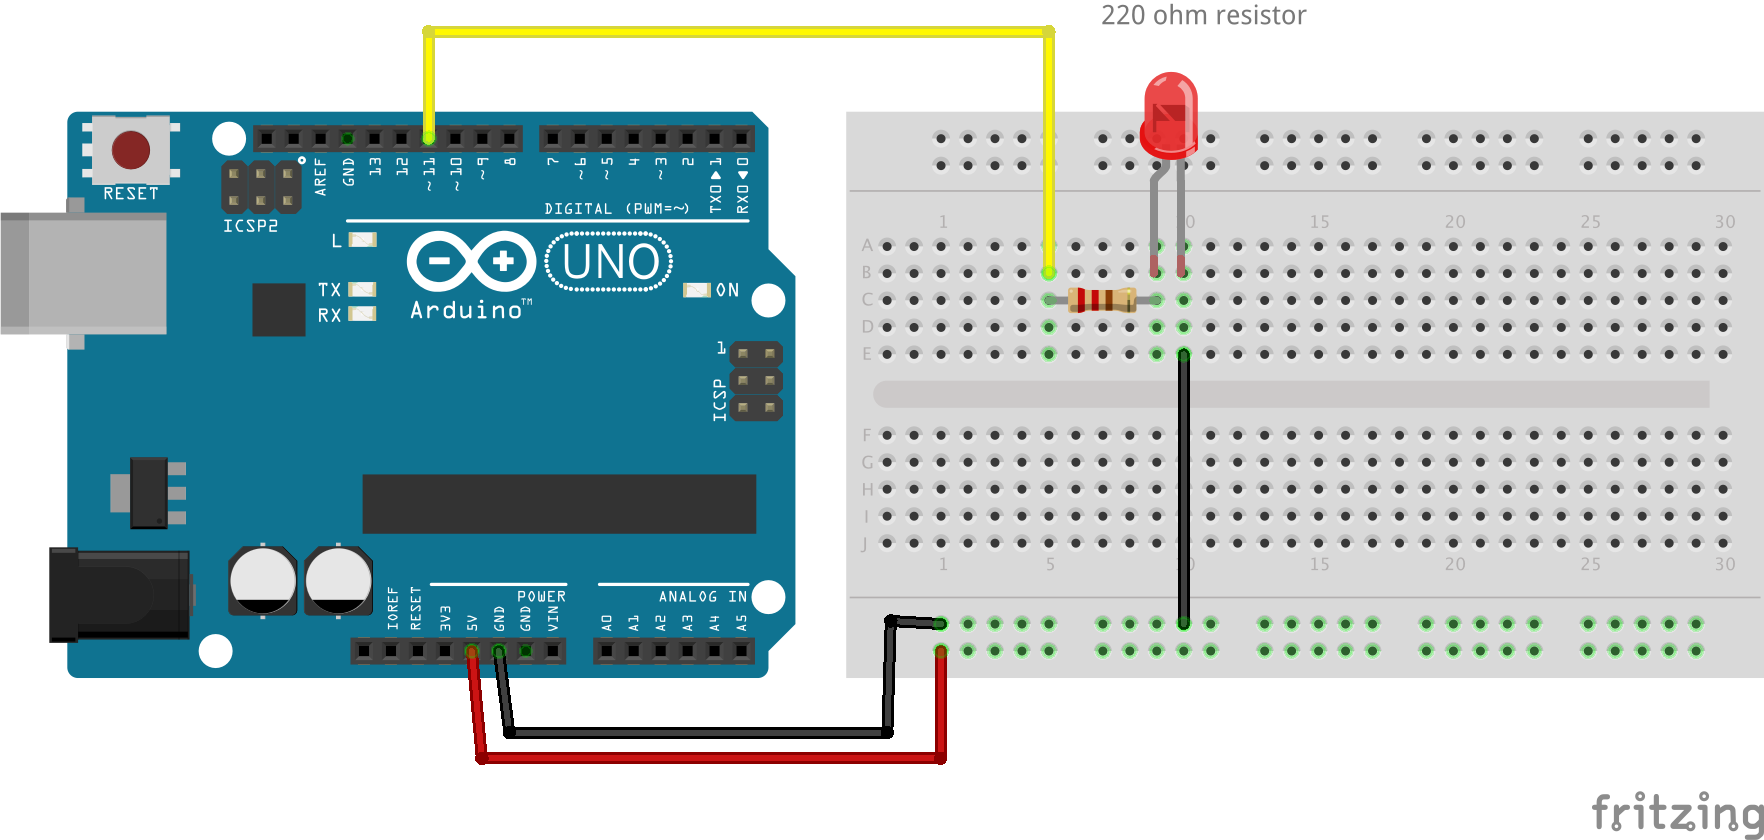
- 220 ohm resistor
int ledPin = 11; // the PWM pin the LED is attached to
int brightness = 0; // how bright the LED is
int fadeAmount = 10; // how many points to fade the LED by
// the setup routine runs once when you press reset:
void setup() {
// declare pin 11 to be an output:
pinMode( ledPin, OUTPUT );
Serial.begin(9600);
}
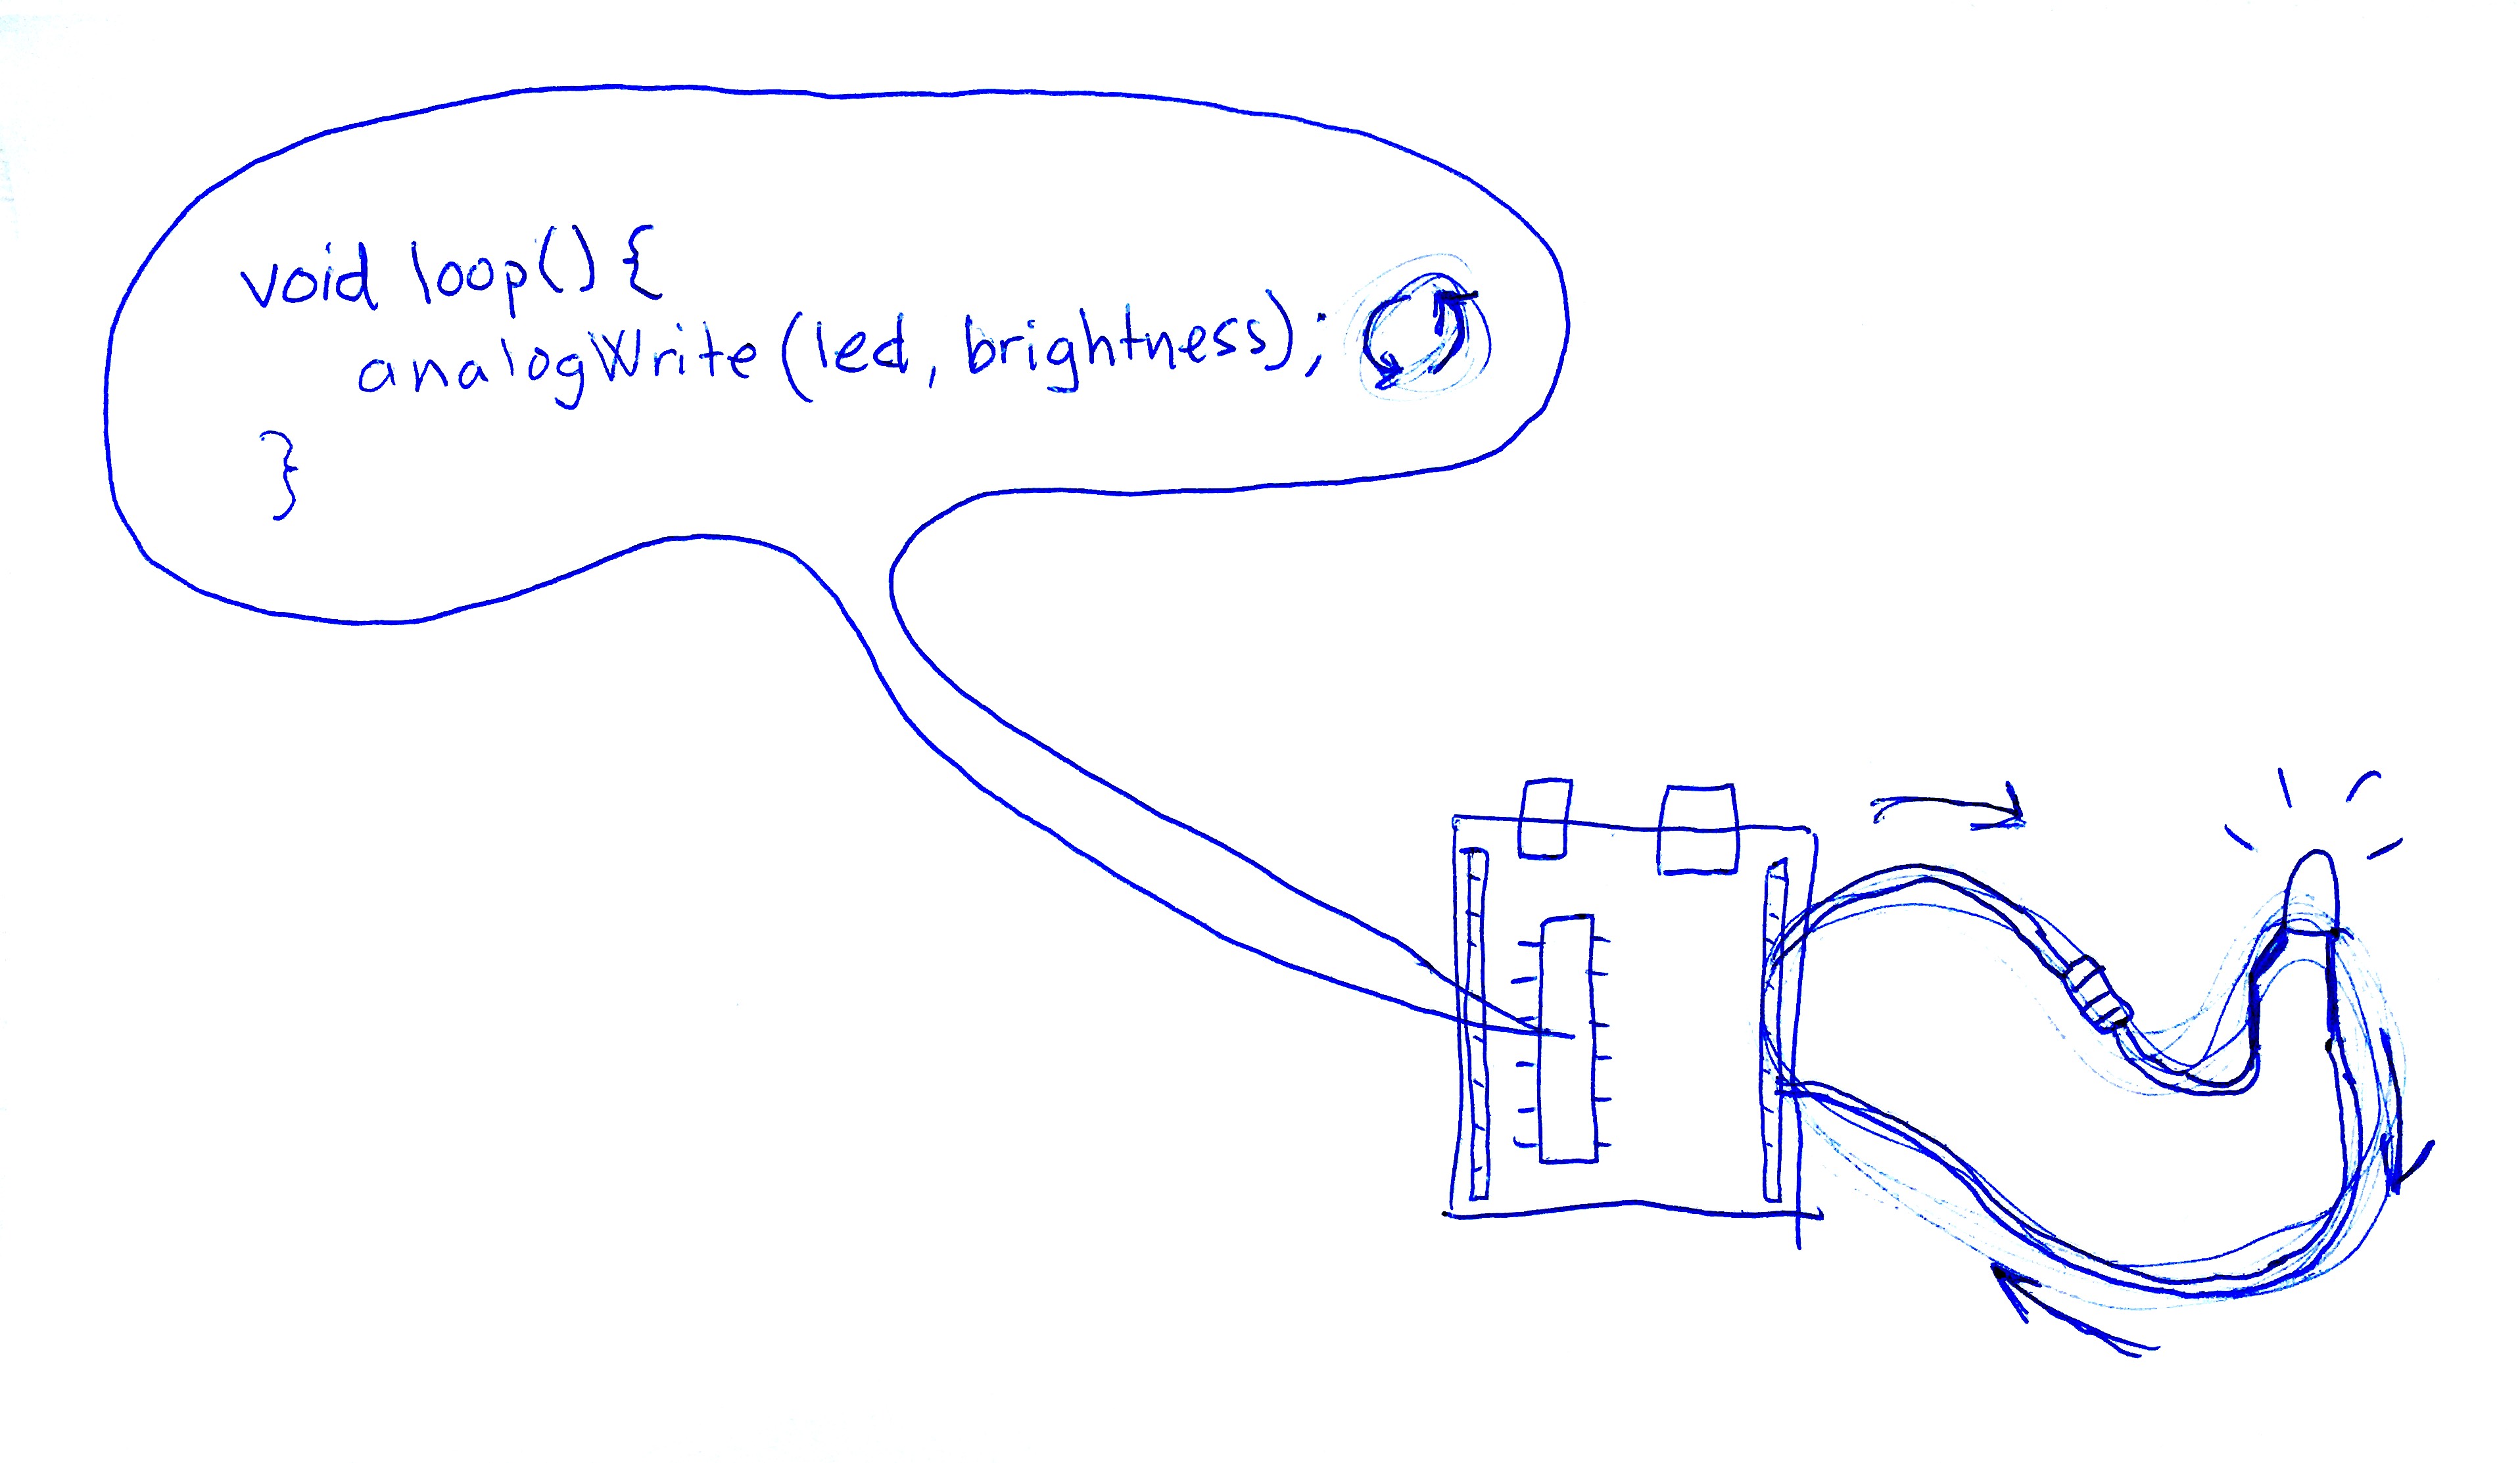
// the loop routine runs over and over again forever:
void loop() {
// set the brightness of pin 11:
analogWrite(ledPin, brightness);
// change the brightness for next time through the loop:
brightness = brightness + fadeAmount;
Serial.println( brightness );
// reverse the direction of the fading at the ends of the fade:
if (brightness <= 0 || brightness >= 255) {
fadeAmount = -fadeAmount;
}
// wait for 30 milliseconds to see the dimming effect
delay(30);
}
Potentiometer
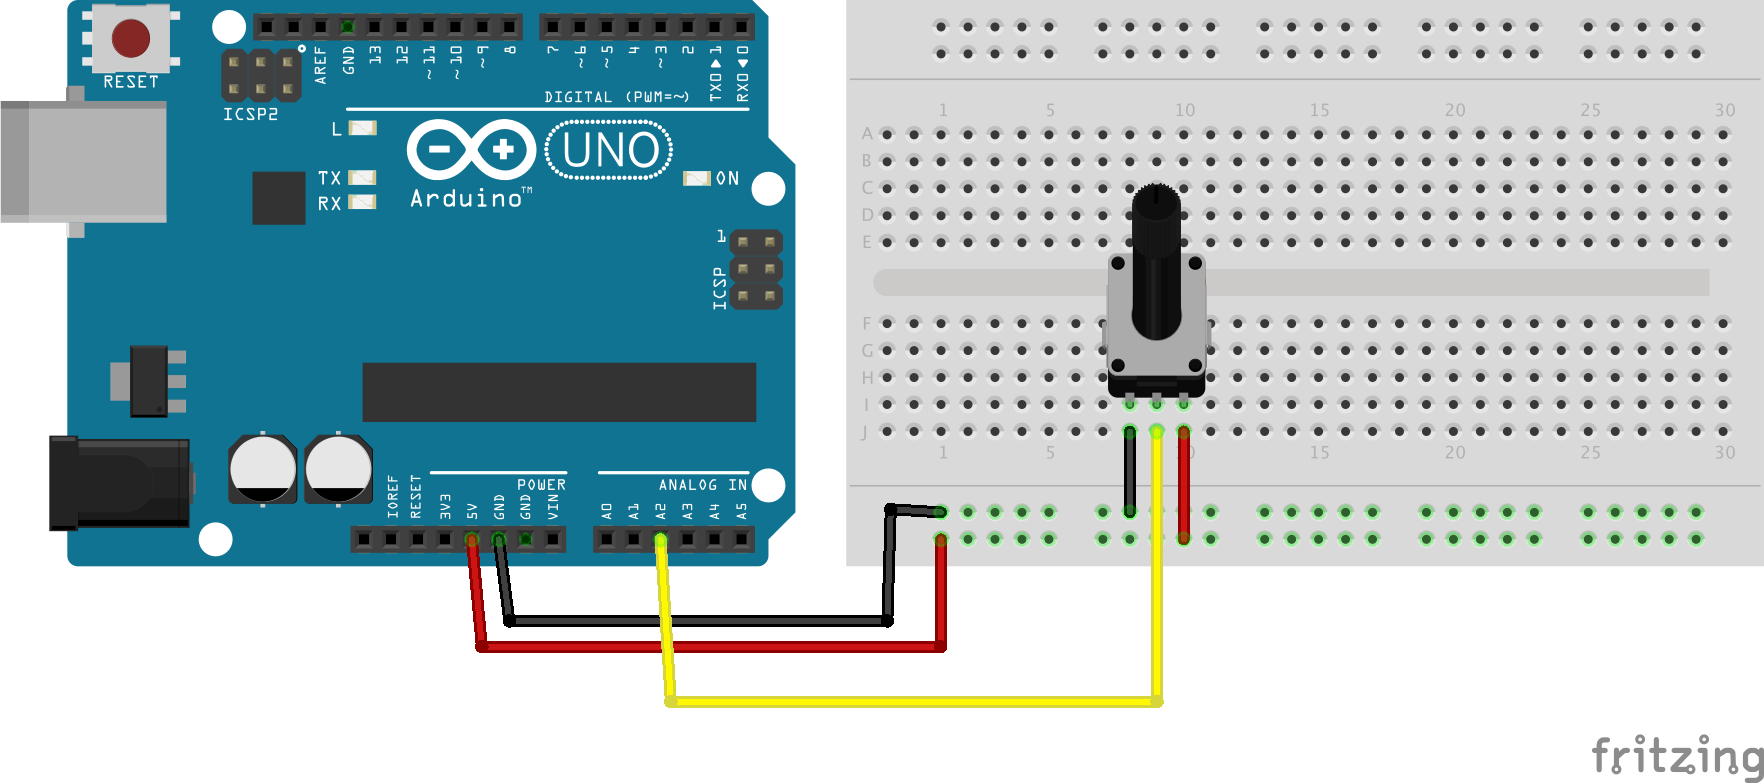
int potPin = A2;    // select the ANALOG input pin for the potentiometer
int value = 0;       // variable to store the value coming from the pot

void setup() {
  Serial.begin( 9600 ); // Start Serial
  pinMode( potPin, INPUT );  // declare the potPin as an INPUT
}

void loop() {
  value = analogRead( potPin );    // read the value from the sensor
  Serial.println( value ); // Write to Serial
}
Potentiometer controlling LED brightness
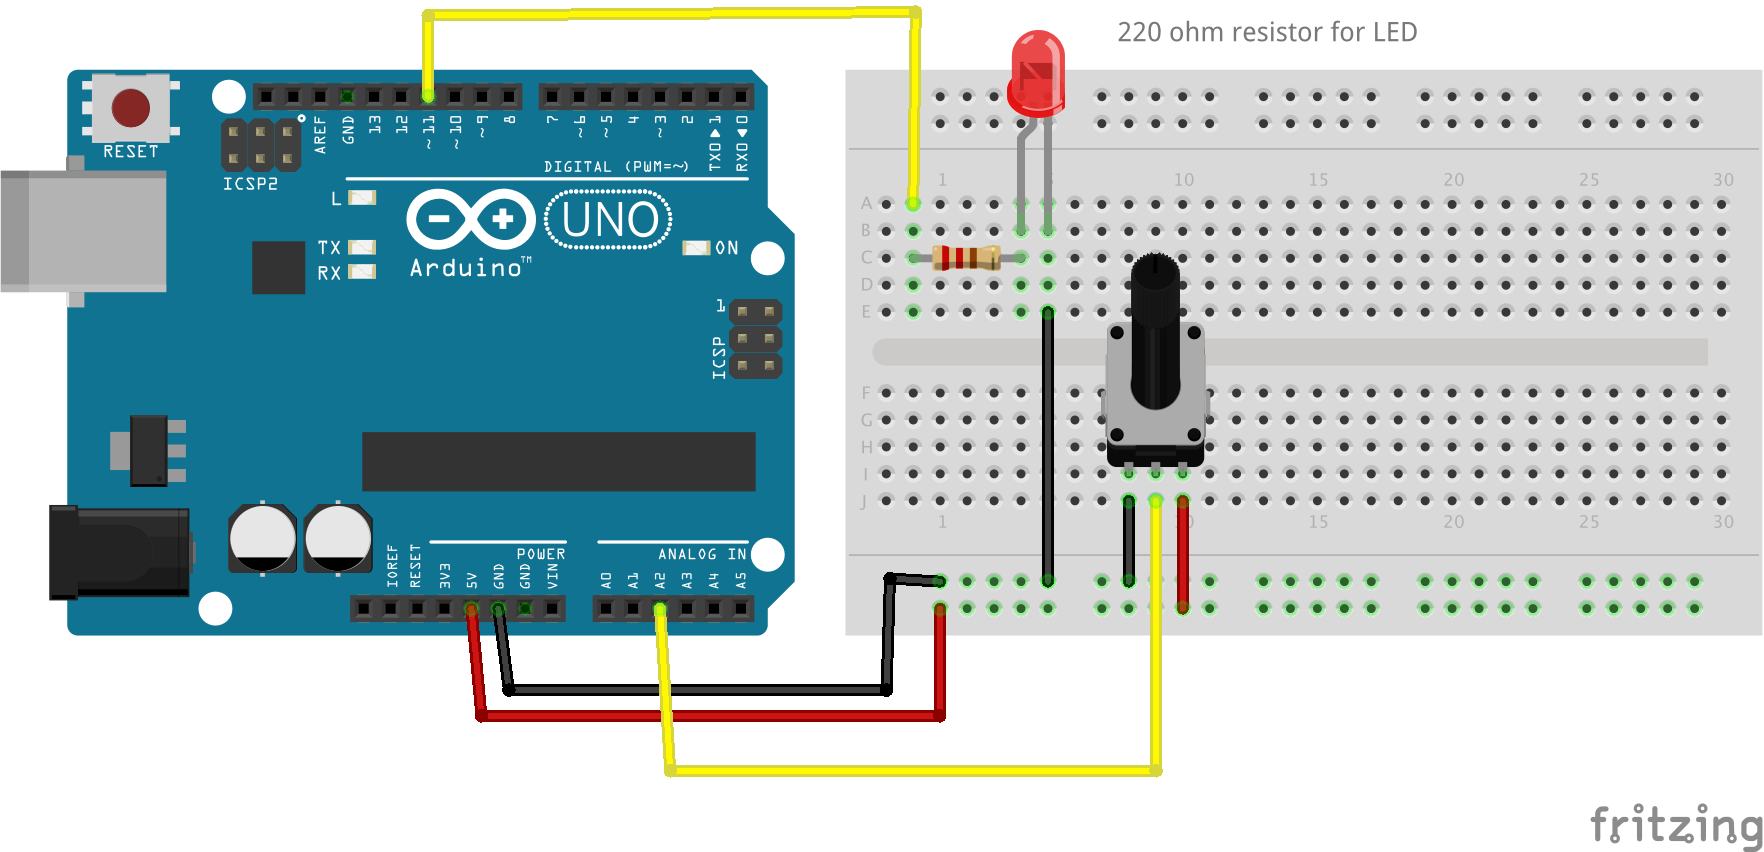
- 220 ohm resistor for LED
int potPin = A2;    // select the ANALOG input pin for the potentiometer
int val = 0;       // variable to store the value coming from the sensor
int ledPin = 11;
int brightness = 255;

void setup() {
  Serial.begin( 9600 ); // Start Serial
  pinMode( potPin, INPUT );  // declare the ledPin as an OUTPUT
  pinMode( ledPin, OUTPUT );
}

void loop() {
  val = analogRead( potPin );    // read the value from the sensor
  Serial.print( "Potentiometer: " );
  Serial.println( val ); // Write to Serial

  brightness = map( val, 0, 1023, 0, 255 ); // Scale analog potentiometer values to LED values
  Serial.print( "Brightness: " );
  Serial.println( brightness );
  analogWrite( ledPin, brightness );
}
Servo
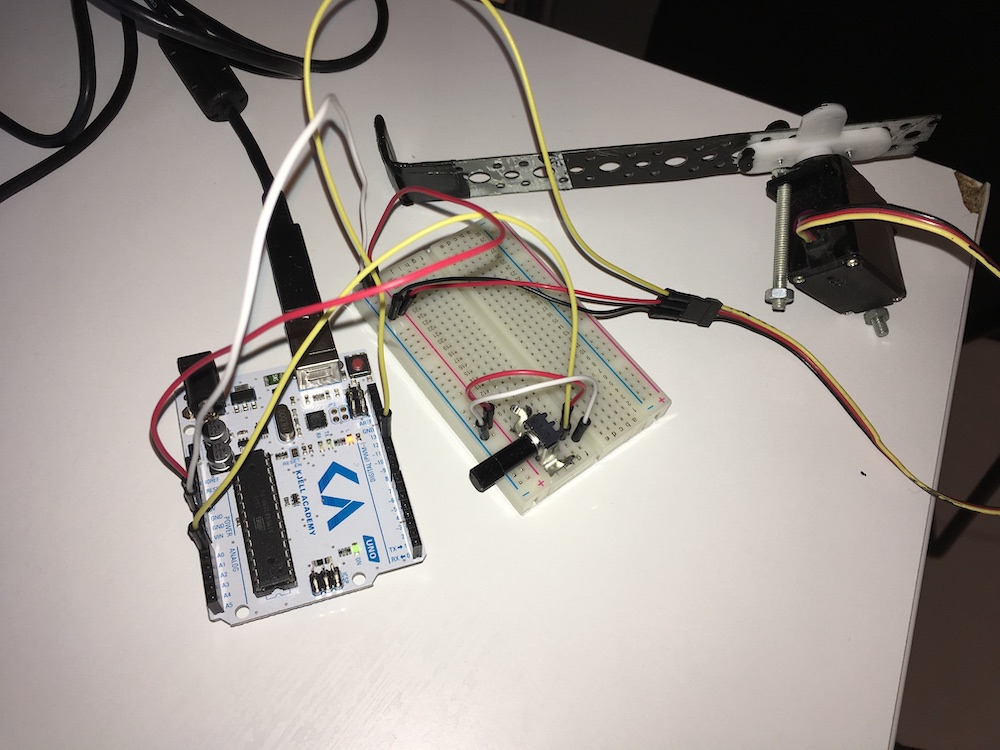

#include "Servo.h"

Servo myservo;  // Create the servo object

int potPin = A2; // Analog pin for pot-meter
int potVal; // Variable to store value from pot-meter
int servoPin = 11; // Pin to controll servo

void setup() {
  myservo.attach( servoPin );  // The servo is controlled with pin 11
}

void loop() {
  potVal = analogRead( potPin ); // Read pot into pot variable
  int scaledValue = map( potVal, 0, 1023, 0, 180 ); // Scale pot-value 0-1023 to servo angle value 0-180
  myservo.write( scaledValue ); // Set the servo to its new position with the scaled value
  delay( 15 ); // Waits for the servo to reach destination
}
Piezo speaker

- 1M ohm resistor
int piezoPin = 8;
int freq = 44;
int toneDuration = 500;

void setup() {

}

void loop() {

    tone( piezoPin, freq, toneDuration );

    delay( 2000 );

}
Ultra Sonic and Piezo Speaker
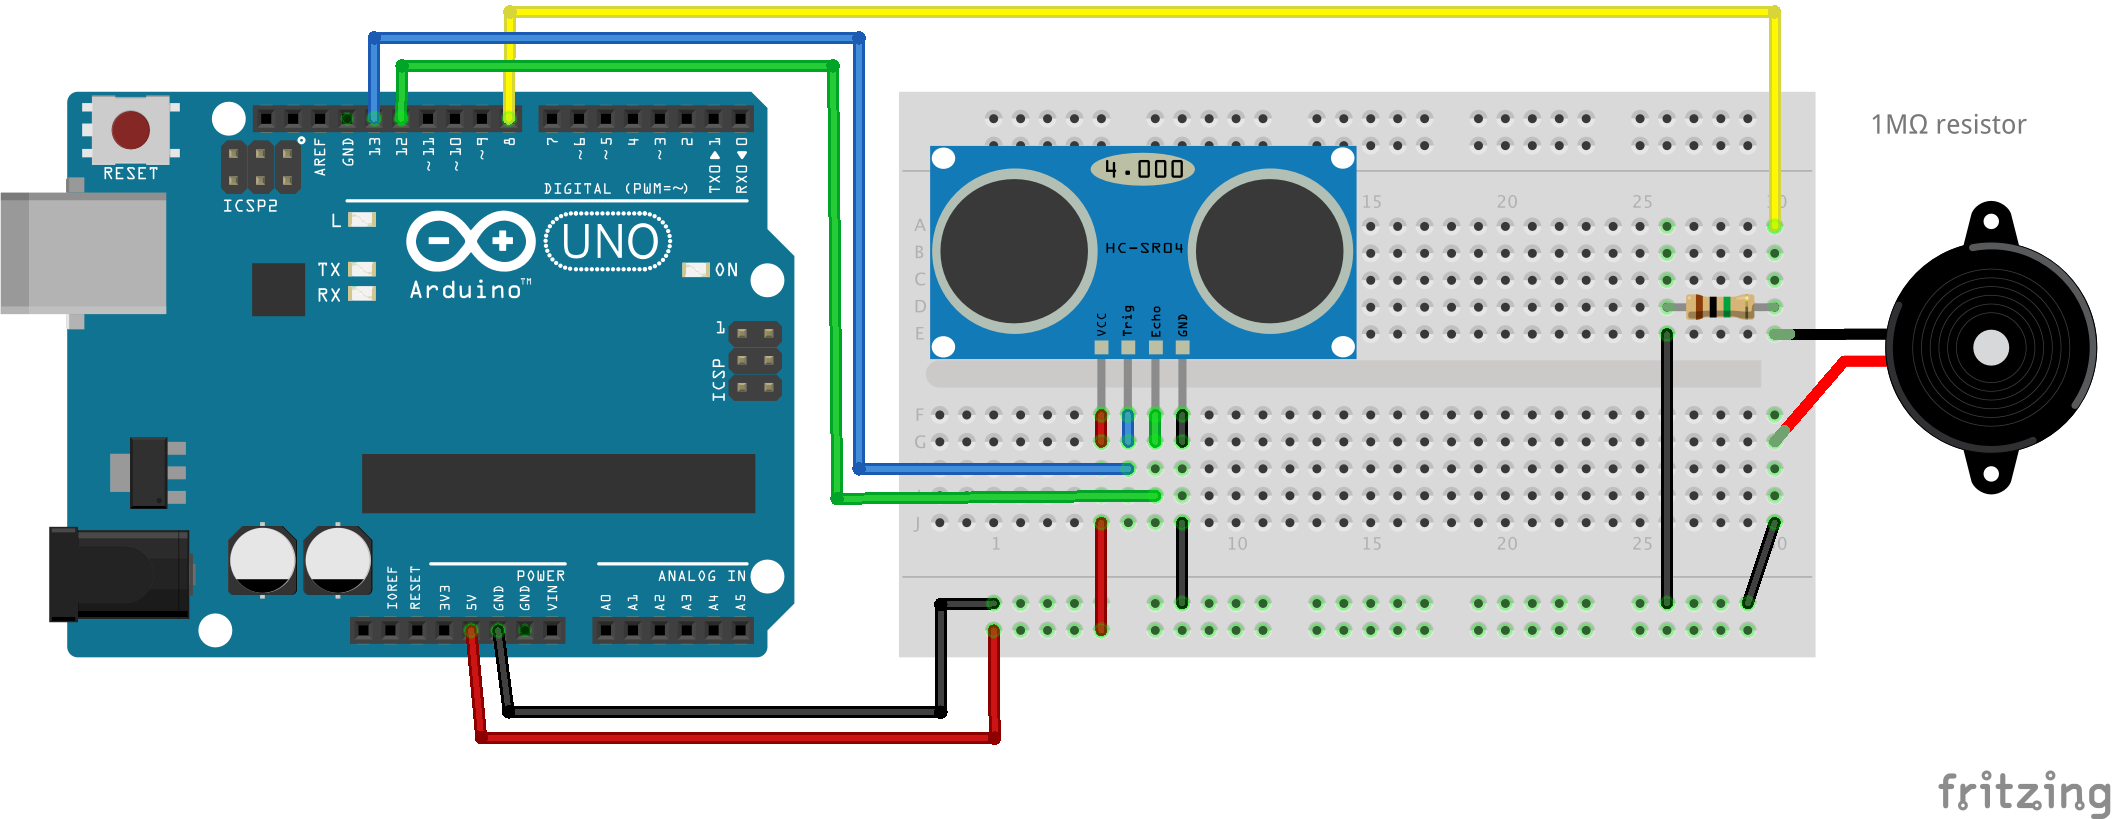
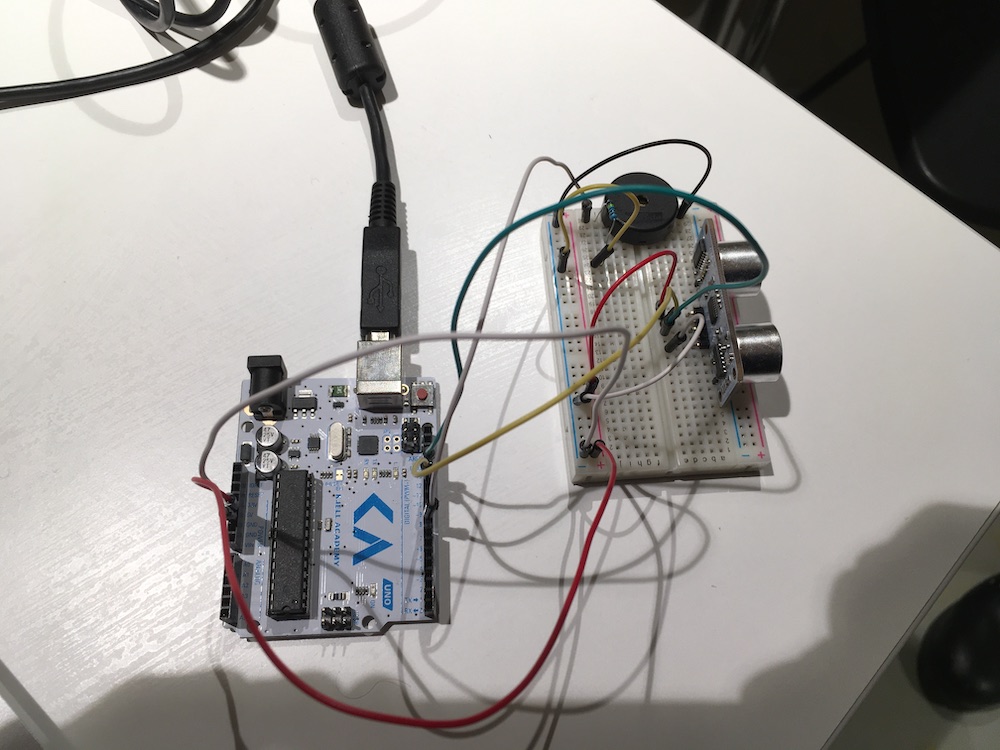
const unsigned int TRIG_PIN = 13;
const unsigned int ECHO_PIN = 12;
const unsigned int BAUD_RATE = 9600;
const int piezoPin = 8;
int freq = 440;

void setup() {
  pinMode( TRIG_PIN, OUTPUT );
  pinMode( ECHO_PIN, INPUT );
  Serial.begin( BAUD_RATE );
}

void loop() {
  digitalWrite( TRIG_PIN, LOW );
  delayMicroseconds( 2 );
  digitalWrite( TRIG_PIN, HIGH) ;
  delayMicroseconds( 10 );
  digitalWrite( TRIG_PIN, LOW );

  const unsigned long duration = pulseIn( ECHO_PIN, HIGH );
  int distance = duration/29/2;

  if( duration == 0 ){
    Serial.println( "Warning: no pulse from sensor" );
  } else {
    Serial.println( distance );
  }

  freq = map( distance, 0, 3000, 44, 4400 );

  tone( piezoPin, freq, 500 );

  delay(100);

 }
Photocell light sensor controls LED


- 220 ohm resistor for LED
- 1K ohm resistor for photocell light sensor
int photocellPin = 0;     // the cell and 10K pulldown are connected to a0
int photocellReading;     // the analog reading from the sensor divider
int LEDpin = 11;          // connect Red LED to pin 11 (PWM pin)
int LEDbrightness;        //
void setup(void) {
  // We'll send debugging information via the Serial monitor
  Serial.begin(9600);
}

void loop(void) {
  photocellReading = analogRead(photocellPin);

  Serial.print("Analog reading = ");
  Serial.println(photocellReading);     // the raw analog reading

  // LED gets brighter the darker it is at the sensor
  // that means we have to -invert- the reading from 0-1023 back to 1023-0
  //photocellReading = 1023 - photocellReading;
  //now we have to map 0-1023 to 0-255 since thats the range analogWrite uses
  int clampedValue = constrain( photocellReading, 0, 100 );

  Serial.print("Clamped = ");
  Serial.println(clampedValue);

  LEDbrightness = map(clampedValue, 100, 0, 0, 255);
  analogWrite(LEDpin, LEDbrightness);

  delay(100);
}
PIR motion detection sensor
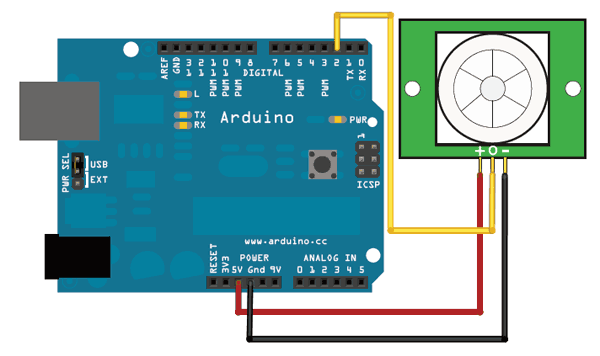
  /*
 * PIR sensor tester
 */

int ledPin = 13;                // choose the pin for the LED
int inputPin = 2;               // choose the input pin (for PIR sensor)
int pirState = LOW;             // we start, assuming no motion detected
int val = 0;                    // variable for reading the pin status

void setup() {
  pinMode(ledPin, OUTPUT);      // declare LED as output
  pinMode(inputPin, INPUT);     // declare sensor as input

  Serial.begin(9600);
}

void loop(){
  val = digitalRead(inputPin);  // read input value
  if (val == HIGH) {            // check if the input is HIGH
    digitalWrite(ledPin, HIGH);  // turn LED ON
    if (pirState == LOW) {
      // we have just turned on
      Serial.println("Motion detected!");
      // We only want to print on the output change, not state
      pirState = HIGH;
    }
  } else {
    digitalWrite(ledPin, LOW); // turn LED OFF
    if (pirState == HIGH){
      // we have just turned of
      Serial.println("Motion ended!");
      // We only want to print on the output change, not state
      pirState = LOW;
    }
  }
}
Stepper motor 28BYJ-48
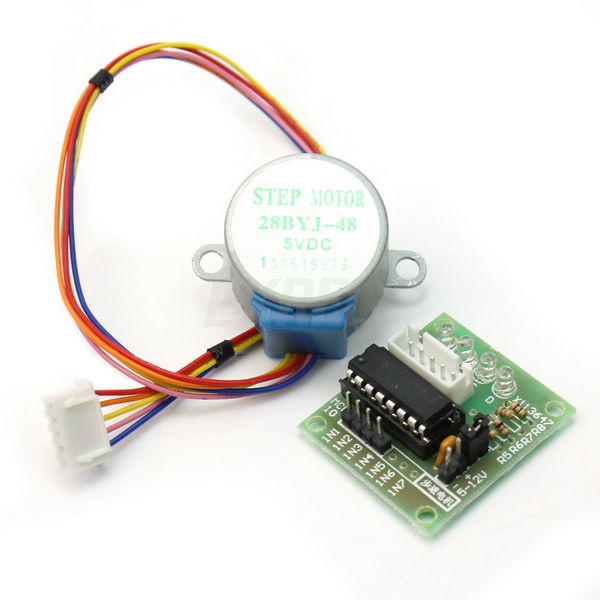
IN1 -> pin 3
IN2 -> pin 4
IN3 -> pin 5
IN4 -> pin 6
+ -> 5V
- -> GND
#include "AccelStepper.h"
#define HALFSTEP 8

// Motor pin definitions
#define motorPin1  3     // IN1 on the ULN2003 driver 1
#define motorPin2  4     // IN2 on the ULN2003 driver 1
#define motorPin3  5     // IN3 on the ULN2003 driver 1
#define motorPin4  6     // IN4 on the ULN2003 driver 1

// Initialize with pin sequence IN1-IN3-IN2-IN4 for using the AccelStepper with 28BYJ-48
AccelStepper stepper1(HALFSTEP, motorPin1, motorPin3, motorPin2, motorPin4);

void setup() {
  stepper1.setMaxSpeed(1000.0);
  stepper1.setAcceleration(100.0);
  stepper1.setSpeed(200);
  stepper1.moveTo(20000);

}//--(end setup )---

void loop() {

  //Change direction when the stepper reaches the target position
  if (stepper1.distanceToGo() == 0) {
    stepper1.moveTo(-stepper1.currentPosition());
  }
  stepper1.run();
}